
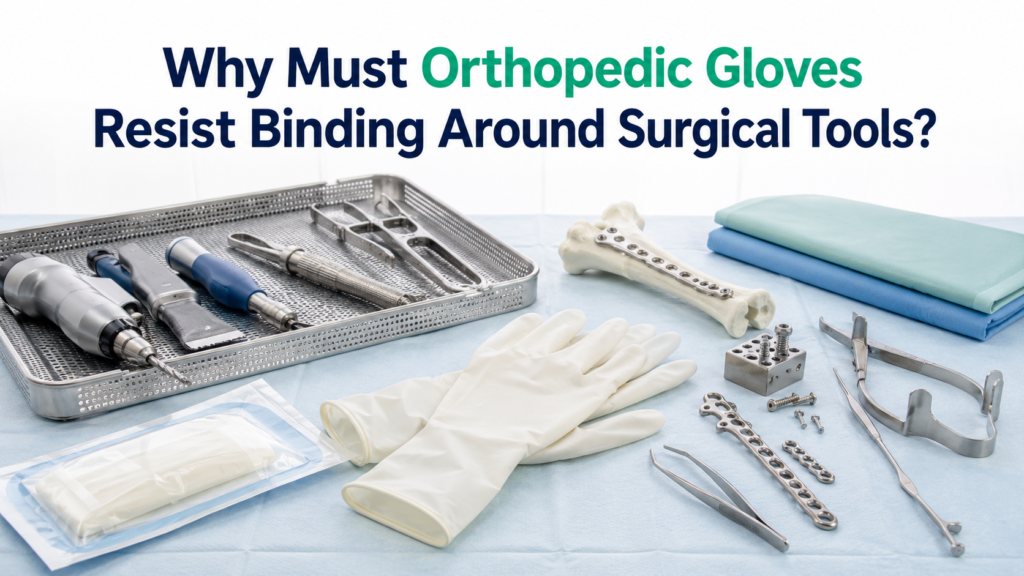
Why Must Orthopedic Gloves Resist Binding Around Surgical Tools?
Orthopedic Gloves must resist binding around surgical tools because powered, high-resistance, sharp, or high-friction orthopedic instruments can catch, twist, bunch, or weaken glove material. Drills, saws, wire drivers, rasps, clamps, retractors, implant-handling tools, friction, vibration, torque, and contact pressure can raise tool-glove interaction risk, so Orthopedic Gloves can support safer handling only when surface behavior, fit, elasticity, and layering are verified; they are not snag-proof or puncture-proof.
This page explains tool-binding risk, surface and grip balance, fit and elasticity, double-gloving compatibility, tool snag response, PMMA bone cement contact, fatigue and poor control, sharps exposure response, and a final tool-compatibility checklist.
This article provides educational guidance about Orthopedic Gloves and tool-binding risk and does not replace product labeling, manufacturer surface or compatibility data, orthopedic tool instructions, facility operating-room protocol, surgical hand antisepsis procedure, sterile gloving training, infection-control policy, sharps safety systems, occupational-exposure procedures, or surgical team judgment. The exact procedure, tool system, glove product, surface finish, fit, double-gloving setup, PMMA or adhesive exposure, and local protocol must determine whether Orthopedic Gloves are suitable.
Why do Orthopedic Gloves need surface and fit control around high-torque surgical tools?
Orthopedic Gloves need surface and fit control around high-torque surgical tools because friction, vibration, torque, contact pressure, loose glove material, or incompatible layers can increase tool-binding risk.[FDA]
Orthopedic Gloves belong to the wider category because medical gloves differ through clinical contact, sterile barrier needs, and precision fit. Tool-binding risk matters because Surgical barrier control governs operative glove compromise. Orthopedic glove design should match procedure stress because orthopedic surgical builds support heavier bone and joint handling demands. Tool-binding risk also connects to glove selection because Orthopedic vs standard Surgical Gloves explains broader orthopedic glove suitability.
What creates binding risk around orthopedic tools?
Binding risk around orthopedic tools is created by repeated friction, vibration, torque, contact pressure, moving tool interfaces, and glove material behavior at the hand-tool contact area.
Drills, saws, wire drivers, rasps, clamps, retractors, and implant-handling instruments can all create higher-resistance contact, but tool operation and setup must remain governed by tool manufacturer instructions and facility training.
Why can Orthopedic Gloves snag or bunch?
Orthopedic Gloves can snag or bunch when excess material, poor fit, high tack, interlayer drag, sticky residue, or fatigue-related fit loss allows glove material to gather or catch near the tool interface.
Loose fingertips, palm tenting, loose webbing, high-tack surface behavior, poor double-glove layer compatibility, material transfer, residue, and reduced fit control during long procedures can all increase bunching or binding risk.
What can happen if a glove binds around a tool?
If a glove binds around a tool, the event may weaken or tear the glove barrier, disrupt sterile handling, reduce instrument control, increase wearer injury risk, and require glove replacement and sterile-field reassessment. [PubMed]
Tool binding should be managed immediately according to facility protocol, without assuming that visual inspection alone proves the glove barrier remains intact.
What is the role of Orthopedic Gloves?
Orthopedic Gloves should support secure grip, reduced bunching, controlled tool handling, sterile barrier protection, compatible double-gloving, procedure-specific fit, and safer response when snagging is suspected.
That role is supportive rather than absolute because Orthopedic Gloves are not snag-proof, binding-proof, puncture-proof, or a replacement for tool controls, sterile technique, or exposure-response protocol.[FDA KGO]
Rotating or oscillating tool interface
Glove Risk FactorLoose material, tack, or contact near moving parts.
Possible ConsequenceSnag, tear, or suspected perforation.
VerifyFit, surface behavior, and tool clearance.
ResponseStop activation when safe and replace compromised layer.
High-resistance hand-tool contact
Glove Risk FactorPalm tenting or webbing slack.
Possible ConsequenceBunching and reduced control.
VerifySize, model, and layer fit.
ResponseRecheck fit during safe pause.
Repeated friction and vibration
Glove Risk FactorSurface drag or interlayer movement.
Possible ConsequenceFatigue, twisting, or glove weakening.
VerifyManufacturer data and user fit testing.
ResponseMonitor and change if compromised.
Sticky residue or material transfer
Glove Risk FactorIncreased tack or glove surface change.
Possible ConsequenceDrag, snagging, or contamination concern.
VerifyProduct compatibility and substance exposure.
ResponseReplace if sticky, degraded, or contaminated.
Longer procedure time
Glove Risk FactorFit loss, sweating, or hidden damage.
Possible ConsequenceBunching, fatigue, or missed breach.
VerifyChange-out triggers and team monitoring.
ResponseReplace per protocol or when integrity is uncertain.
Which Orthopedic Glove surface features help balance snag reduction with secure tool grip?
Orthopedic Glove surface features help balance snag reduction with secure tool grip only when finish, coating, texture, lining, tackiness, drag, and fit behavior are verified for the exact product and procedure.
How can surface finish affect tool binding?
Surface finish can affect tool binding because coatings, textures, linings, tackiness, and drag may influence how the glove grips tools, moves between layers, or catches around contact points.
Surface behavior may support donning, grip, or interlayer movement, but it varies by product, material, coating, texture, thickness, storage condition, and surgical environment.
Why should friction claims be product-specific?
Friction claims should be product-specific because there is no universal ideal friction coefficient that proves an Orthopedic Glove will balance tool control and snag reduction in every surgical environment.
Friction, grip, and snag risk should be evaluated through manufacturer data, product labeling, facility-approved supply information, user fit testing, procedure requirements, and sterile-team experience.
How should grip and snag reduction be balanced?
Grip and snag reduction should be balanced by choosing Orthopedic Gloves that provide secure tool control without excessive tackiness, loose material, interlayer drag, or loss of tactile feedback.
The goal is enough grip for instrument control, enough surface control to reduce snagging, enough tactile feedback for precision, enough fit stability to reduce loose material, and enough sterile handling discipline to prevent contamination.
What coating claims should be avoided?
Coating claims should be avoided when they turn one surface treatment into a universal rule for tool-binding prevention.
Do not claim that chlorination always creates the best glide, polyurethane always prevents binding, acrylic coatings always reduce tool snag, smooth palms are always better, textured palms are always safer, low friction always prevents snagging, or high grip always prevents tool loss.
Smooth or low-tack finish
Possible UseMay reduce drag in some glove systems.
Grip ConsiderationMust still support secure tool control.
Snag-Risk ConsiderationLow drag is not always safer.
VerifyManufacturer data and sterile-team trial.
Textured surface
Possible UseMay support grip in selected tasks.
Grip ConsiderationTexture should not create excessive catch points.
Snag-Risk ConsiderationTextured is not always safer than smooth.
VerifyProduct data and tool-handling suitability.
Coating or lining
Possible UseMay affect donning, interlayer movement, or drag.
Grip ConsiderationMust not reduce needed control.
Snag-Risk ConsiderationCoating claims are product-specific.
VerifyProduct labeling and manufacturer documentation.
High-tack behavior
Possible UseMay feel secure in some hand-tool contact.
Grip ConsiderationExcess tack can increase drag.
Snag-Risk ConsiderationMay contribute to bunching or catch.
VerifyFit trial and procedure-stress evaluation.
Residue or material transfer
Possible UseNo intended benefit.
Grip ConsiderationCan change tool feel.
Snag-Risk ConsiderationMay increase snagging or contamination concern.
VerifyReplace if sticky, degraded, or contaminated.
How do Orthopedic Gloves use fit and elasticity to reduce bunching around moving instruments?
Orthopedic Gloves use fit and elasticity to reduce bunching around moving instruments only when the selected size, model, material, layer setup, and elastic recovery keep excess material away from tool contact points without restricting safe movement.
Binding risk is partly a fit issue because anatomical fit supports surgical control.
Why does fit matter for Orthopedic Gloves?
Fit matters for Orthopedic Gloves because loose glove material can increase bunching, while overly tight gloves can increase fatigue, webbing tension, tearing risk, and loss of control.
The goal is not the tightest glove; it is the best-fitting approved glove model that reduces slack while preserving movement, circulation comfort, and tool control.
What fit problems increase binding risk?
Fit problems increase binding risk when they create loose material, restricted motion, layer movement, or unstable hand-tool contact.
Loose fingertips, palm tenting, excess webbing, cuff rolling, thumb restriction, double-glove layer shifting, over-tightness, and loss of tactile control should all be checked before tool use.
How does elastic recovery help?
Elastic recovery can help Orthopedic Gloves return toward their intended shape after stretching, gripping, or tool handling, reducing slack and bunching risk when the finished product is appropriate.
Elastic recovery depends on the finished product, material, thickness, sterilization method, age, storage, and manufacturer design, so universal tensile or elongation numbers should not be invented.
How should teams select fit safely?
Teams should select fit safely by testing approved glove size, model, and double-glove layering before relying on the setup near moving instruments.
Users should not automatically size down because over-tight gloves can restrict motion, increase fatigue, raise webbing tension, and reduce safe tool control.
Loose fingertips
Binding RiskExtra material may catch or bunch near tool contact.
Fatigue RiskReduced tactile control.
CheckFingertip length and tool handling feel.
Safer AdjustmentTry approved size or model with less slack.
Palm tenting
Binding RiskPalm material can fold under grip pressure.
Fatigue RiskMore grip force may be needed.
CheckPalm fit during simulated instrument hold.
Safer AdjustmentRecheck size, model, and layer fit.
Excess webbing
Binding RiskWebbing slack can gather during grip changes.
Fatigue RiskThumb movement may feel unstable.
CheckWeb space tension and movement.
Safer AdjustmentChoose approved fit that reduces slack without tightness.
Over-tightness
Binding RiskMaterial may strain or tear under motion.
Fatigue RiskCramping, restricted thumb, circulation pressure.
CheckFinger flexion and thumb motion after donning.
Safer AdjustmentDo not automatically size down; use approved alternative.
Layer shifting
Binding RiskInner and outer gloves may twist or drag.
Fatigue RiskLoss of control during tool handling.
CheckMovement after double-gloving.
Safer AdjustmentUse compatible layers and facility-approved setup.
How should Orthopedic Gloves be double-gloved without creating interlayer drag or loss of control?
Orthopedic Gloves should be double-gloved without creating interlayer drag or loss of control by using approved, compatible layers that allow secure grip, controlled motion, sterile handling, and procedure-specific monitoring.
Breach visibility can matter because indicator undergloves can help reveal some barrier breaches. Orthopedic Gloves still need sterile surgical use because surgical sterilization supports sterile operative use.
When is double-gloving used with Orthopedic Gloves?
Double-gloving may be used with Orthopedic Gloves when procedure risk, sharps exposure, bone or hardware handling, case duration, facility protocol, product instructions, indicator-system requirements, or team preference supports an added barrier layer. [Cochrane]
Double-gloving should not be treated as universal for every orthopedic tool case, and it does not eliminate sharps exposure or replace tool controls.
What does compatibility mean during double-gloving?
Compatibility during double-gloving means the inner and outer layers allow comfortable movement without excess drag, bunching, layer twisting, or loss of tool control.
The goal is not simply low friction; the goal is controlled movement, secure grip, sterile handling, and enough comfort to avoid fatigue-driven control loss.
How should glove layers be selected?
Glove layers should be selected through product instructions, facility protocol, sterile technique requirements, indicator-system design, size compatibility, material compatibility, and procedure risk.
No one universal under-glove surface, coating, color, material, thickness, or brand should be prescribed unless the exact product system and facility protocol specify it.
What should the team check after double-gloving?
After double-gloving, the team should check fingertip slack, palm tenting, webbing, cuff stability, thumb motion, finger flexion, interlayer drag, and tool-handling control.
If drag, bunching, twisting, or fatigue appears, the setup should be reassessed during a safe pause and replaced with an approved compatible combination when needed.
Assess procedure risk
CheckTool stress, sharps, hardware, duration, PMMA exposure, and policy.
RiskUnder-layering or over-layering.
Select approved layers
CheckProduct compatibility, manufacturer instructions, size, material, indicator design.
RiskInterlayer drag, tightness, or twisting.
Don by sterile technique
CheckFacility-approved sterile gloving method.
RiskContamination during setup.
Check fit and movement
CheckSlack, webbing, palm, cuff, thumb, instrument control.
RiskBunching or fatigue.
Monitor for drag or bunching
CheckTool handling feel and visible layer shift.
RiskSnagging or control loss.
Replace if compromised
CheckTear, puncture, contamination, indicator spot, fatigue, degradation.
RiskContinued use after compromise.
How should clinical teams respond when Orthopedic Gloves snag, tear, or contact bone cement?
Clinical teams should respond when Orthopedic Gloves snag, tear, or contact bone cement by stopping unsafe action when possible, maintaining instrument control, replacing compromised gloves, reassessing the sterile field, and following product or exposure protocols.
What should happen if Orthopedic Gloves snag around a tool?
If Orthopedic Gloves snag around a tool, tool activation should be stopped immediately when safe, instrument control should be maintained, and caught glove material should not be pulled against the moving or trapped interface.
Follow sterile-team protocol for safe disengagement, replace any compromised glove layer, reassess the sterile field before continuing, and follow facility exposure procedures if injury, contamination, or uncertain glove integrity occurs.[OSHA Change]
What should happen if Orthopedic Gloves contact PMMA bone cement?
If Orthopedic Gloves contact PMMA bone cement, the team should follow manufacturer compatibility data and facility protocol rather than assuming the glove material is safe or failed. [PubMed]
Unnecessary prolonged direct contact should be avoided, and gloves should be replaced if instructions require it or if they become sticky, softened, discolored, contaminated, degraded, or difficult to use safely.
What should happen if Orthopedic Gloves cause fatigue or poor tool control?
If Orthopedic Gloves cause fatigue or poor tool control, the team should use a safe transition or pause to recheck fit, layer compatibility, hand position, and the approved glove model.
Loss of control, cramping, thumb restriction, palm bunching, or reduced tactile precision should not be ignored because fatigue can increase tool-handling and barrier-risk problems.
What should happen after a cut, puncture, or sharps exposure through Orthopedic Gloves?
After a cut, puncture, or sharps exposure through Orthopedic Gloves, the affected task should stop safely and the facility occupational-exposure pathway should begin. [OSHA][NIOSH]
Immediate routing should include glove removal, washing cuts or needlesticks with soap and water, flushing splashes as appropriate, reporting the incident, seeking medical evaluation according to protocol, and replacing gloves before any safe return to the field.[OSHA BBP]
Glove catches on rotating or oscillating tool
Immediate Safety ActionStop activation when safe and maintain instrument control.
Replace Gloves?Replace any compromised layer.
Field Recheck?Reassess before continuing.
Exposure Protocol?Follow if injury or contamination is possible.
Glove twists, bunches, or restricts tool control
Immediate Safety ActionPause during safe transition and recheck fit/layers.
Replace Gloves?Replace if control is compromised.
Field Recheck?Reassess sterile handling.
Exposure Protocol?Not unless injury/exposure occurred.
PMMA bone cement contacts glove
Immediate Safety ActionFollow product compatibility guidance.
Replace Gloves?Replace if required or if degraded/sticky/contaminated.
Field Recheck?Reassess if contamination is possible.
Exposure Protocol?Follow if skin or fluid exposure occurred.
Visible tear or suspected puncture
Immediate Safety ActionStop affected task when safe.
Replace Gloves?Replace compromised layer.
Field Recheck?Reassess sterile field.
Exposure Protocol?Follow if skin injury or exposure possible.
Cut, puncture, or sharps exposure
Immediate Safety ActionStop safely, remove gloves, wash/flush as appropriate.
Replace Gloves?Replace before returning.
Field Recheck?Reassess sterile-field status.
Exposure Protocol?Report and seek medical evaluation per protocol.
Which final checklist verifies Orthopedic Gloves are ready for tool-binding risk before incision?
A final Orthopedic Glove and tool-compatibility checklist should verify tool hazards, surface and grip balance, double-gloving compatibility, fit and slack, tool readiness, PMMA or adhesive exposure, snag response, and sharps-exposure readiness before incision.
Final Orthopedic Glove and tool-compatibility checklist
Orthopedic Gloves are ready for tool-binding risk before incision only when tool hazards, surface behavior, layer compatibility, fit, tool readiness, PMMA exposure, snag response, and sharps-exposure plans align.
A completed checklist supports readiness review, but it does not replace product labeling, manufacturer documentation, sterile technique, tool manufacturer instructions, facility policy, surgical team judgment, or occupational-exposure protocol.
Conclusion
Orthopedic Gloves must resist binding around surgical tools because tool-glove interaction can compromise barrier integrity, sterile handling, instrument control, and wearer safety. Safer use depends on product-specific surface behavior, grip and drag balance, fit and elasticity, compatible double-gloving, tool readiness, PMMA or bone cement compatibility boundaries, and a defined response plan.
Orthopedic Gloves are not snag-proof or puncture-proof, low friction is not always safer, high grip is not always safer, surface and fit claims must remain product-specific, indicator systems do not detect every breach, and PMMA compatibility requires exact product data. Snagging, tearing, puncture, fatigue, contamination, and sharps exposure require prompt replacement, sterile-field reassessment, and facility protocol.
Frequently Asked Questions
Why must Orthopedic Gloves resist binding around surgical tools?
Orthopedic Gloves must resist binding around surgical tools because rotating, oscillating, sharp, or high-resistance instruments can catch loose, tacky, poorly fitted, or incompatible glove material and compromise control or barrier integrity.
Are Orthopedic Gloves snag-proof?
No. Orthopedic Gloves may reduce snagging and bunching risk when properly selected and fitted, but they are not snag-proof, puncture-proof, or tool-proof.
Is a low-friction Orthopedic Glove always safer?
No. Low friction is not always safer because Orthopedic Gloves still need enough grip for secure tool control, tactile feedback, and sterile handling.
Should teams size down to reduce glove bunching?
No. Teams should not automatically size down because overly tight gloves can increase fatigue, webbing tension, tearing risk, circulation restriction, and loss of control.
Can double-gloving increase drag or bunching?
Yes. Double-gloving can increase drag, twisting, or bunching if the layers are not compatible, so layer setup should follow product instructions, facility protocol, fit needs, and procedure risk.
What should happen if a glove snags around a tool?
If a glove snags around a tool, tool activation should be stopped when safe, instrument control should be maintained, caught glove material should not be pulled against the tool, compromised gloves should be replaced, and the sterile field should be reassessed.